

Phae Project Dev Log 3: Adding dialogues and quests
Dev Log 3
This week I started using Dialogue System and Quest Machine to add some quests to my game. Both asset are made by Pixel Crushers and they might be the best assets I have tried so far. They feel very proffesional and have a ton of flexibility while still being simple to use. The documentation is also top notch. I also made some eyes for my character. They don’t look like I want right now, but at least I was able to use them to write an eyetracking script for blendshapes.
Here is the breakdown of this week
Wednesday : 2h
I thought I would explore other alternatives for the cape movement because I do not like how it behaves. I have tested the cloth component in Unity and I believe it will give much better results compared to using bones with DynamicBone.
Thursday : 4h
After a lot of fustration with the cloth component I decided to remove it. This component is probably the buggiest in unity. First the paint tool did not work at all, and the component messed up my skinned mesh bounding box. Trying to fix the bounding box Unity moved my renderers to infinity in the prefab view and now it won’t let me move it back. So story short I have to remake all my prefab variants because the variant it messed up was the base one.
So after all this frustration I think I will go for option 3: animating the cape with a shader. This won’t give the physics simulation effect I wanted but it should work nicely for now. It turns out I might completely remove the cape and replace it by a hat/helmet instead so I won’t put too much time into it. I just want to have fun with the shader graph to be fair.
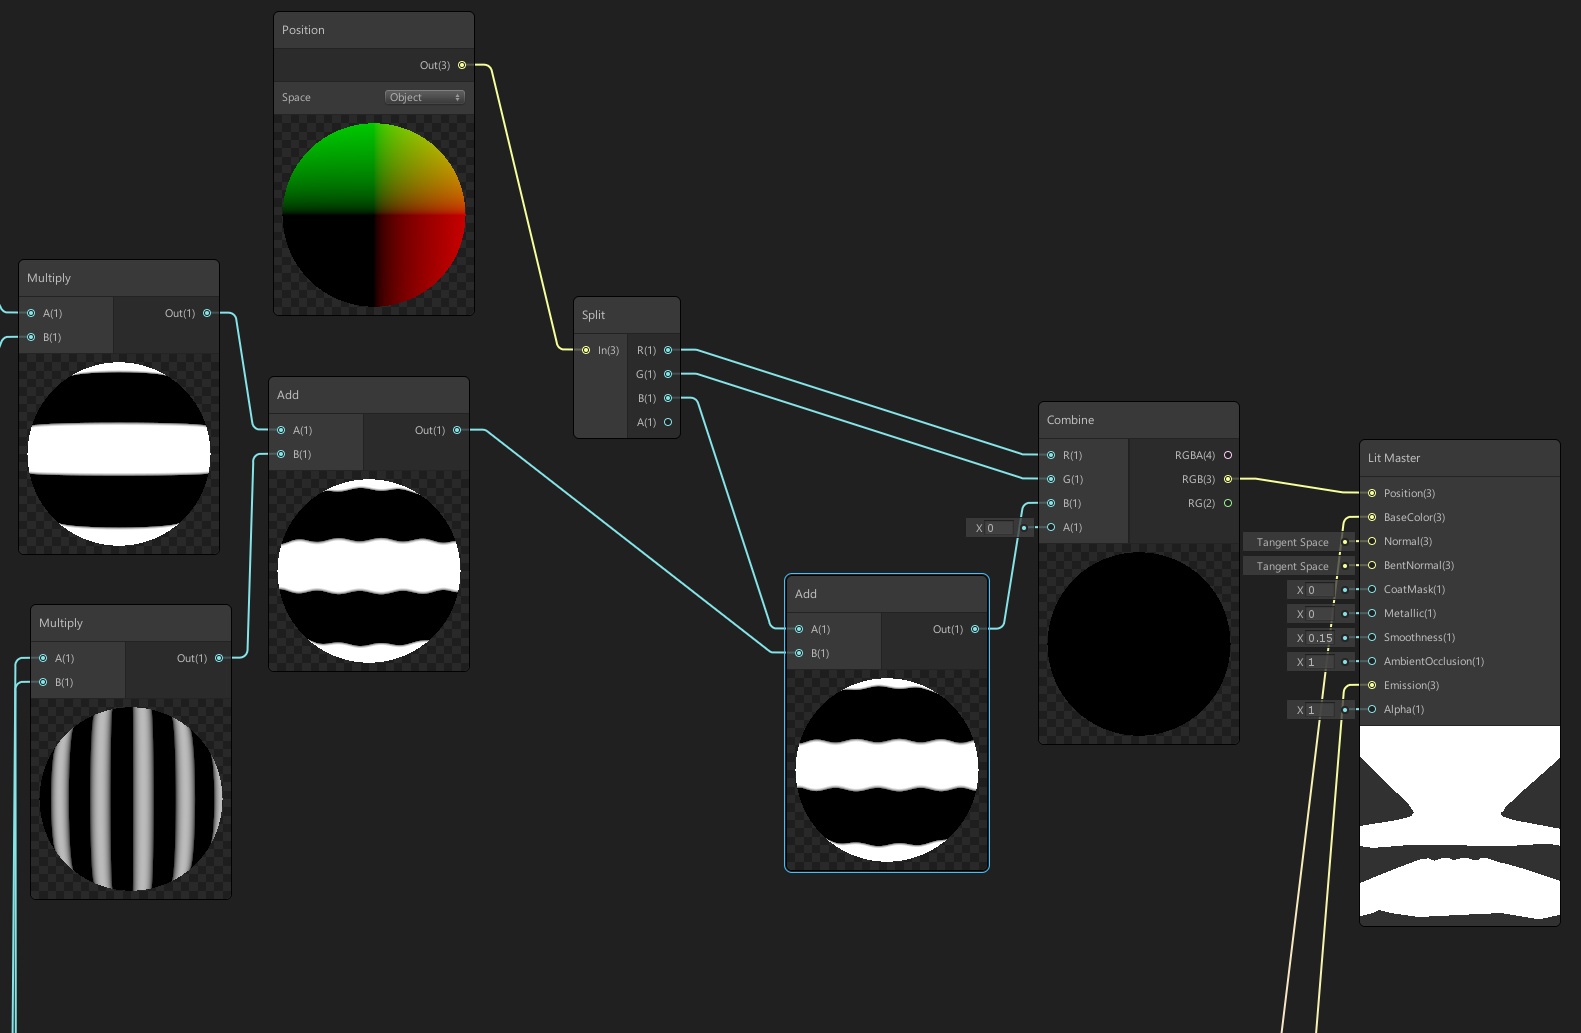
So the cape needs to move but the cape “object” includes the head cover. So I need to use a mask to prevent the shader from moving the vertex on everything. For my purpose the best way to go is vertex painting mask. So in Blender I used the vertex paint tool to paint everything black and then I made the parts I want to move red (important to note red as we use it in the shader). But turns out the vertex paint tool is not very good to make precise adjustments. To help myself I used an addon that can be used to manually change the vertex colors of my mesh. This lets me have a perfectly smooth gradient on the cape.
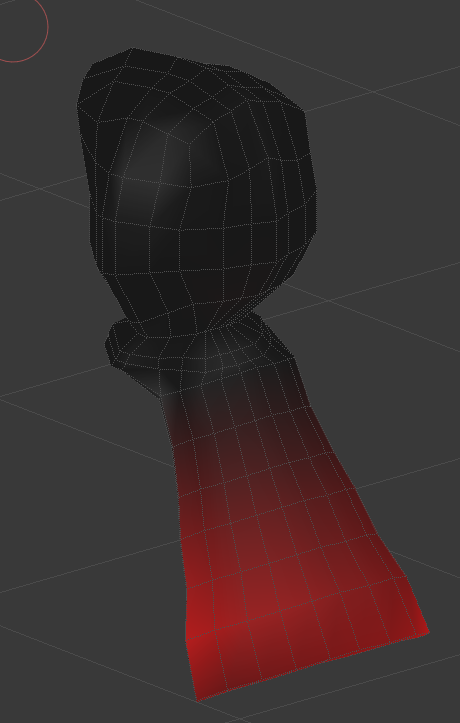
Without this perfectly smooth gradient my cape would look ripped apart when used with the shader.
Now in shader graph I used the position parameter to displace the vertex with sinusoidal waves. I have an X and Y sine wave. Here you can see the nodes I use to make the X wave:
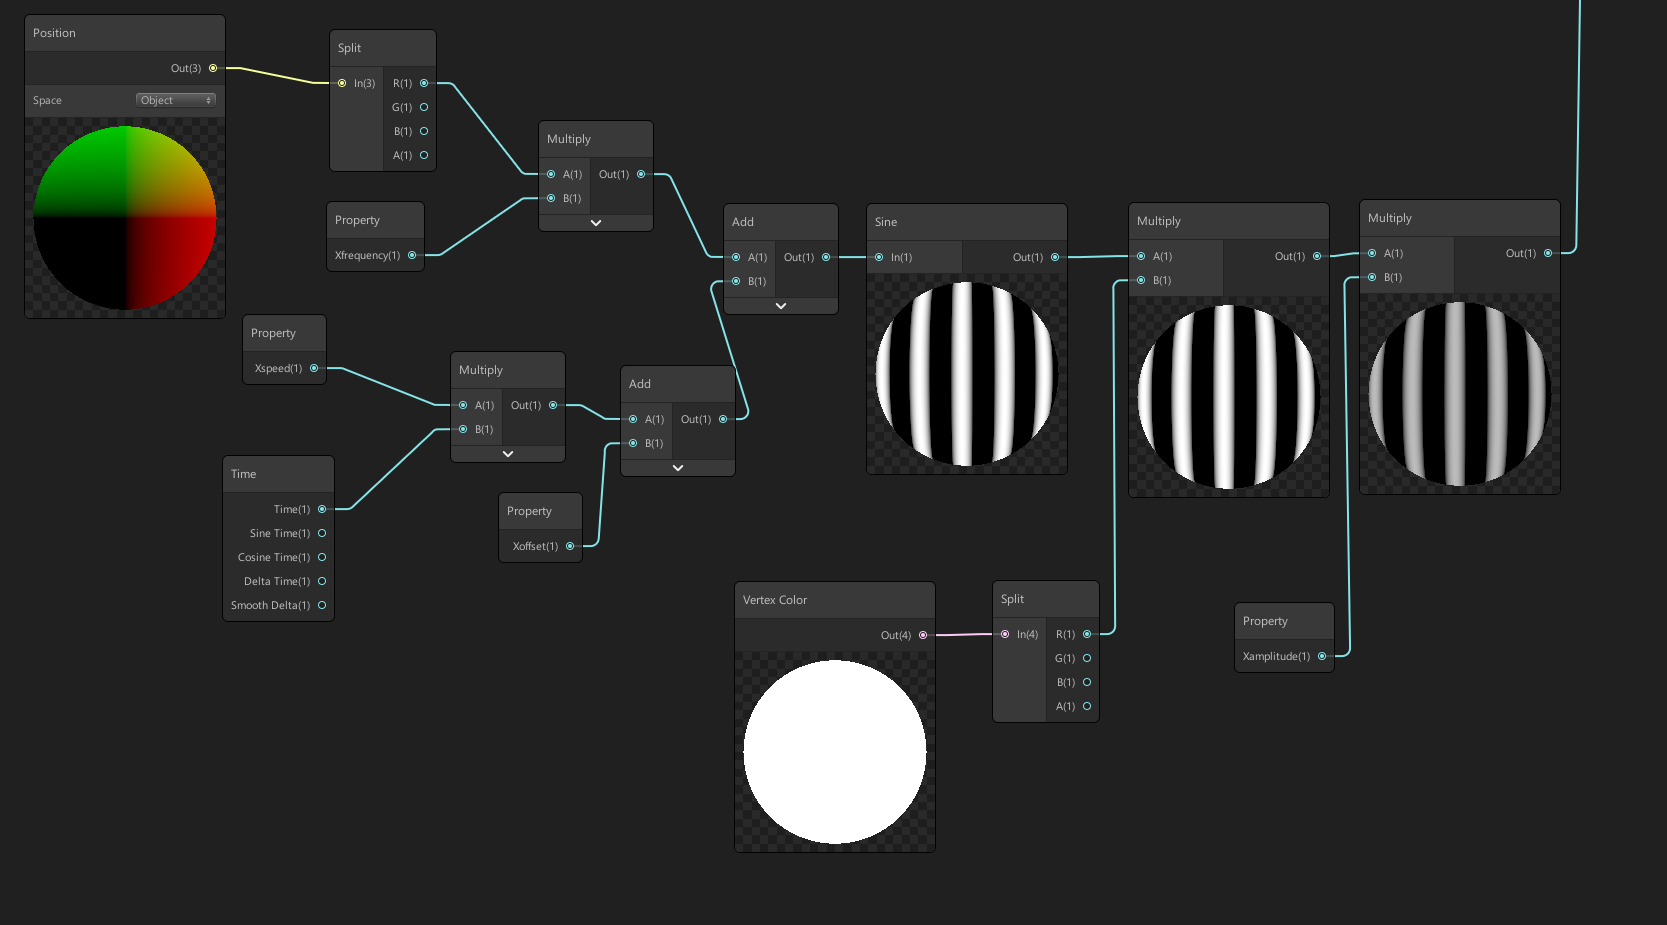
I use the object position and get its X axis. I do a few multiplications and additions to get the frequency and speed that I want for the cape movement and pass it inside a sine function. I then multiply the sine with the vertex color red channel. This will make sure only the vertex I painted in red move. And since I have a gradient of red the amplitude of the waves will be higher on the extremities than at the top of the cape. I do the exact same thing for the Y axis.
I can then add the X and Y waves to the default object position and voila I got a shader moving cape
The shader on its own is not enough because the cape does not react to sudden movements like jump, fall, etc… But the nice thing is that I can use it with the bone or cloth technique I used before. I might go back to bone physics but this time with something I program myself to get the exact results I want. It will be for another time.
Friday : 8h
Starting to get back into learning how to use the assets I bought, I thought it was time to look at Quest Machine and Dialogue System for Unity by Pixel Crushers. I started by reading some of the documentation to have a basic understanding of the functions they have. I then took the time to import all the integration packages for the other assets I own (TPC, Rewired, etc..). I followed the basic “Getting started” tutorials for both Dialogue System and Quest machine. I am very impressed with the quality of both assets so far. They are very well structured and easy to use.
I decided to look into Quest machine first because my goal for this week is to get a quest to kill three enemies. After following the video tutorials on their youtube channel I was able to make three type of quests: explore, collect, defeat enemies. The asset has a ton of flexibility and yet it is very easy to use. I was able to make all these quests without touching a line of code. My only concern is that it uses a ton of string function calls which can cause a bit of chaos when you often write typos like me. They have a reference window, which helps with that though. It contains buttons that copy function names to your clipboard. Of course I will most probably use their API directly in my scripts, when the time comes to make quests for real.
The Quest Machine and Dialogue System assets can work together to have a conversation with the NPC before he offers you a quest. And Dialogue System can tell TPC when a conversation has started to enable/disable some inputs (stop movement, fix camera, enable cursor, etc..)
My goal for this week will be to use all of them together to make a little story about goblins causing trouble and the need to defeat them.
Saturday : 8h
I followed all the Dialogue system video tutorials from the PixelCrushers youtube channel. The customization it offers for dialogue is pretty incredible. I integrated the Dialogue System and Quest Machine in my scene. I also changed the default conversation UI to something that will fit my game better. The sprites are still random things I found in my project and will need to be changed.
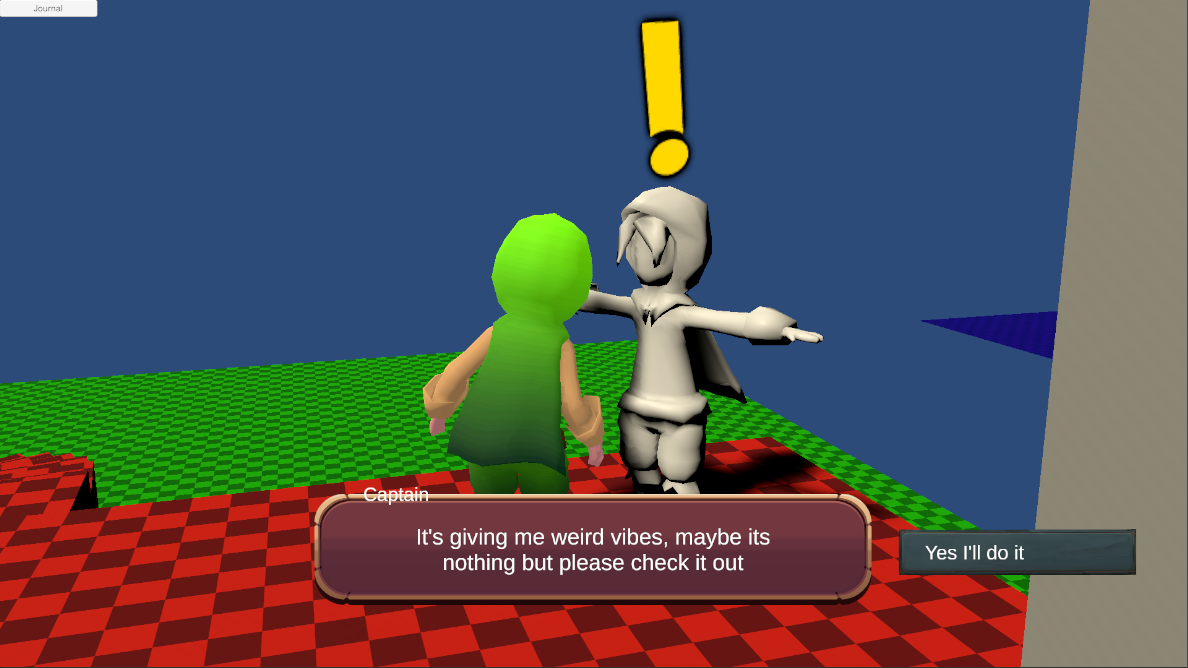
Using Cinemachine, I also tried to transition the camera of the player to a conversation camera (like the image above) but so far without success. I am not sure if I should trigger the change from TPC ability or from Dialogue System conversation or from something else. I realise that I do not have a lot of control using TPC to control things in the world. For this I will need to get used to their API. So far I was able to Interact with the NPC using a little script I wrote that triggers an event when the character uses the interact ability. I used the event to start the Quest conversation. I tried getting a callback from an ability activation event to trigger the camera transition on “Converse” start and stop, but I do not know how to use the API for events yet.
I asked for help in the TPC forum hopefully they will help me out.
Sunday : 11h
After reading the answers to my my questions on the TPC forum I was able to get a simple camera transition by extending one of their viewTypes. There are still issues though, I do not have a way to get the target of the conversation through the converse ability. I might need to ask Pixel Crushers for help on this one.
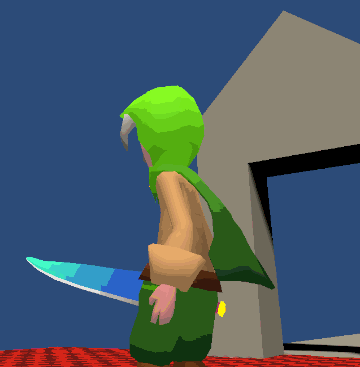
On another note, I want my character to feel more alive so I thought I would make him a face. I followed the first few videos of this tutorial series on modelling a character in Blender. It got me me well started, but I wanted more oval shaped eyes. I found this post, which helped me out getting the oval shape + the shape keys for the eyes. I also added a shape key for opening, closing the mouth and eyelids.
Using the same vertex painting trick I used for the cape, I plan to use a vertex color mask to shade my eyes. Hopefully by using the HDRP I can get some nice transparency and truslency. Of course I made a backup of my blend file and deleted all the shapes that I was not going to use in Unity.
Sunday : 7h
After some time trying to get the eyes to look how I wanted, I kind of gave up. I think the problem has to do with the lighting in my scene. There is only a single light and it probably is not well set up for the effect I was going for. One day I will look at tutorials to set up lighting for the HDRP. In the meantime I made some custom shaders for the eyes, using the vertex colors, to have different colors and effects on the iris. I’m not too happy with the results but I’m still learning so I think it should be fine for now.
Once that was done I looked into writing a script for my eyes to follow a target. It took longer than I would like to admit. I always have a hard time visualizing vectors in my mind and I didn’t think about using Debug.Ray() until two hours into trying to get it working. As alway i was very close but a minus was missing somewhere.
The idea here is that you have a head direction and a look direction. You find the angle in between the two directions and you move the eyes accordingly. Since we are using blendshapes with X (Right, Left) and Y (Up, Down), we need to find the local (head) X and Y angle of the look direction. To find the local angle in X, for example, we first project the look vector on the local YZ plane and then gets its signed angle taking the local X axis as reference. Here is a little snippet of the code:
Vector3 headDir = headBone.forward; //model from Blender
Vector3 lookDir = (lookAtTraget.position - (headBone.position + eyesToHeadOffset)).normalized;

//Debug.DrawRay(headBone.position + eyesToHeadOffset, headDir, Color.blue);
//Debug.DrawRay(headBone.position + eyesToHeadOffset, lookDir, Color.red);

Vector3 LookDirX = Vector3.ProjectOnPlane(lookDir, headBone.right);
//Debug.DrawRay(headBone.position + eyesToHeadOffset, LookDirX, Color.magenta);
float x_angle = Vector3.SignedAngle(headDir, LookDirX, headBone.right);//model from Blender
Vector3 LookDirY = Vector3.ProjectOnPlane(lookDir, headBone.up);
//Debug.DrawRay(headBone.position + eyesToHeadOffset, LookDirY, Color.yellow);
float y_angle = Vector3.SignedAngle(headDir, LookDirY, headBone.up);//model from Blender

float thresholdX = 90;
float thresholdY = 90;

if (Mathf.Abs(x_angle) > thresholdX) { x_angle = 0; }
if (Mathf.Abs(y_angle) > thresholdY) { y_angle = 0; }

float dividerX = 60;//180;//Mathf.PI / 2f;
float dividerY = 45;

if (x_angle < 0)
{
    //Right
    float lerp = Mathf.Lerp(0, 100, x_angle / -dividerX);
    eyeCorneaSMR.SetBlendShapeWeight(rightSK, lerp);
    eyeIrisSMR.SetBlendShapeWeight(rightSK, lerp);
    eyeCorneaSMR.SetBlendShapeWeight(leftSK, 0);
    eyeIrisSMR.SetBlendShapeWeight(leftSK, 0);
}
else
{
    //Left
    float lerp = Mathf.Lerp(0, 100, x_angle / dividerX);
    eyeCorneaSMR.SetBlendShapeWeight(leftSK, lerp);
    eyeIrisSMR.SetBlendShapeWeight(leftSK, lerp);
    eyeCorneaSMR.SetBlendShapeWeight(rightSK, 0);
    eyeIrisSMR.SetBlendShapeWeight(rightSK, 0);

}
You can get the blendShape index by name like so:
leftSK = eyeCorneaSMR.sharedMesh.GetBlendShapeIndex("LEFT");I also added a Coroutine to make the character blink. Here is the result:
![]()
Tuesday: 2h
I didn’t have time to work on the game much so I organized the folders a little and fixed a few things in the demo scene.
Recap: 42h
- I removed the cape physics and replaced it by a shader for now
- I learned how to use Dialogue System and Quest Machine
- I used these assets to make three simple quests
- I modelled a face for my character and made some shape keys
- I wrote a script to have the character blink and follow a target with its eyes.
I think I progressed quite a bit. In the end I didn’t have time to model the goblin enemies, but that is not much of a problem. I also think that my current combat mechanic is buggy and not fun.
I should probably focus on the gameplay more. Unfortunatly I am waiting for the 2.1 update for TPC since they will add a lot of features I need for melee combat. It will also add compatibility with Final Ik, which is an asset I own and would like to use. In the mean time I can focus on other features for the game.
Next week I’ll start learning another paid asset called “Inventory Pro”, I would like to set up a simple way to equip/unequip weapons and a health option. I also think it is time I add some UI and try having multiple scenes. Having things (items, music, health) persist in between scenes is not always straight forward, so I should look into scene management too. When I think about it I should also add a save feature before it gets too complicated. Some of the assets like Dialogue System have save features built-in but I might use a dedicated save asset like EasySave since I already own it.
Until next week!